
Most people research CoolSculpting® thoroughly before booking. Then they walk into their first appointment and realize they had no idea what the session itself would feel like or how it would flow. The procedure is straightforward once you know what to expect. This guide covers what happens from the consultation through the post-session massage, and why each step exists.
What does this article cover?
- What happens at the CoolSculpting® consultation and how candidacy gets assessed
- The step-by-step breakdown of the actual procedure from setup through the end of the session
- What the post-session massage does and why it matters clinically
- What to do between sessions to protect your results
Key takeaways
- The CoolSculpting® procedure uses controlled cooling to freeze fat cells, triggering natural cell death called apoptosis, without damaging surrounding skin, nerves, or muscle.
- A peer-reviewed review published in the Aesthetic Surgery Journal Open Forum confirms CoolSculpting® was initially FDA-cleared in 2010 for flank fat reduction and has since been cleared for nine body areas.
- Each treatment cycle runs 35 to 60 minutes per area. Most patients treat two to three areas in one appointment.
- The two-minute massage immediately after each cycle is clinically significant. Research shows it increases fat reduction outcomes by up to 68% compared to sessions without it.
The consultation: what happens before any session is scheduled
The consultation is not a formality. It is where the entire treatment plan gets built.
At New Day Medspa in Jacksonville, every new patient starts with a complimentary consultation before any session is booked. A licensed ARNP or PA reviews your goals, assesses the areas you want to treat, and determines whether the tissue in each zone is actually a good fit for the applicator.
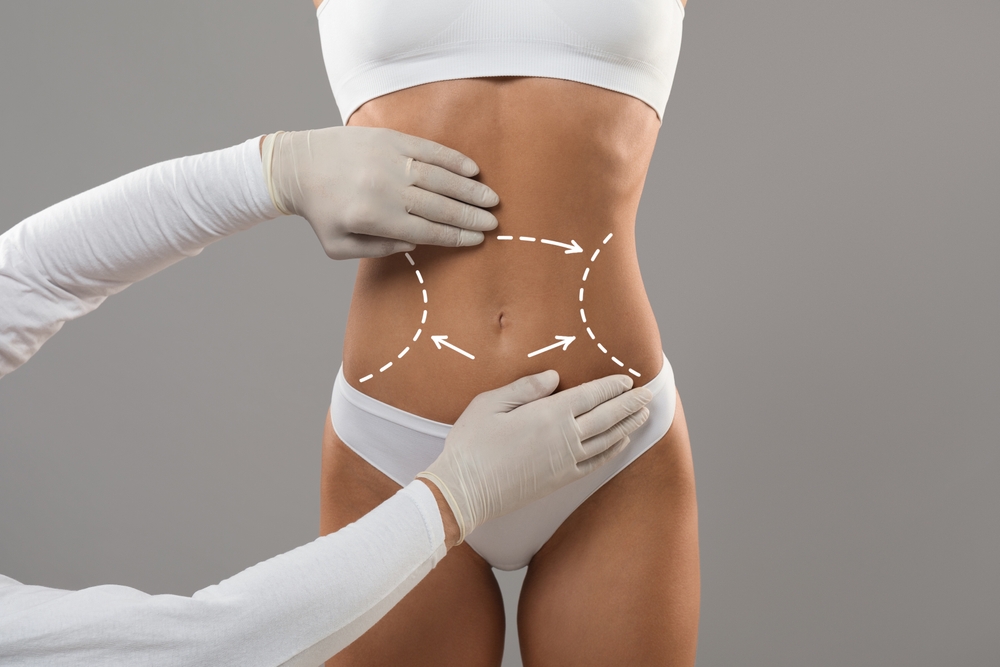
That last part matters more than most patients realize. The applicator works by creating suction that draws a fold of tissue up between two cooling panels. If the fat pocket is too firm, too deep, or too small to engage properly, the treatment will not produce meaningful results. A physical pinch test of the treatment area is part of any proper consultation.
You will also discuss:
- Your current weight and how stable it has been over the past several months
- Medical history, including any conditions that may contraindicate cryolipolysis
- Realistic results expectations for your specific areas and body type
- The number of sessions each area is likely to need
- Total treatment cost and financing options
By the end of the consultation, you have a written treatment plan and a clear picture of what your investment and results will look like.

What to do before your CoolSculpting® appointment
No dramatic prep required. That is part of what makes this procedure accessible for patients with busy schedules.
A few practical steps for the days before your session:
- Wear loose, comfortable clothing to the appointment. Waistbands and tight fabrics on treated areas can cause discomfort afterward.
- Stay well hydrated in the days leading up to treatment. Good hydration supports lymphatic clearance of dead fat cells after the session.
- Avoid anti-inflammatory medications like ibuprofen or aspirin in the days before, as these can increase the risk of bruising. Check with your provider if you take these regularly for another condition.
- Eat a normal meal before your appointment. There is no fasting requirement. A light meal beforehand reduces the chance of lightheadedness during the session.
That is the full prep list: no topical numbing, no special diet, no pre-treatment medications.
Step by step: what happens during the CoolSculpting® procedure
Step 1: Positioning and measurements
Your provider marks the treatment area and takes measurements or photographs before anything begins. This baseline documentation makes it possible to track results accurately over the weeks and months following treatment.
Step 2: Gel pad application
A gel pad goes directly on the skin over the treatment zone. This is a thermal barrier. It protects the skin surface from direct contact with the cooling panels while allowing the cold to pass through to the fat layer underneath. Without the gel pad, the applicator would cause frostbite. It is not optional.
Step 3: Applicator placement and suction
The applicator attaches over the gel pad and creates a gentle vacuum that draws the tissue up between two cooling panels. Most patients feel a firm tugging and pulling sensation at this stage. Some describe it as a strong pinch that holds rather than releases.
Step 4: The cold arrives
Within the first two to three minutes, intense cold hits the treatment area. This is the most uncomfortable part of the entire procedure. The cold is real, and it is significant. Most patients also feel tingling, aching, and pressure during this phase.
Around the five to eight-minute mark, the area goes numb. Once numbness sets in, the discomfort from the cold disappears almost entirely. From that point, most patients read, work on a laptop, or watch something on their phone for the remainder of the cycle.
Step 5: The treatment cycle runs
Each cycle runs 35 to 60 minutes depending on the applicator size and treatment zone. The cooling drops the fat cell temperature to the precise range where cryolipolysis occurs: cold enough to trigger fat cell death through apoptosis, not cold enough to damage the overlying skin or surrounding tissue.
According to a peer-reviewed clinical review published in the Aesthetic Surgery Journal Open Forum, CoolSculpting® works by controlled, localized cooling of subcutaneous fat cells to induce apoptosis without damage to other tissue, with the dead cells subsequently cleared by macrophages through natural inflammatory processes over the following three months. (Aesthetic Surgery Journal Open Forum)
Step 6: Applicator removal and the massage
When the cycle ends, the applicator comes off, and the treated area is visibly firm, cold, and sometimes slightly raised from the suction. It looks unusual. That is normal.
Your provider then massages the treated area for two minutes. This is the step patients are least prepared for. The tissue is cold and stiff, and the massage pressure is noticeable. Most people describe it as intense rather than painful. It is also the most clinically important two minutes of the entire appointment.
Research has shown that manual massage immediately following a cryolipolysis cycle improves fat reduction results by up to 68% compared to sessions without post-treatment massage. It breaks up the crystallized fat cells, increasing the surface area available for macrophage clearance. A provider who skips this step or rushes through it is compromising your outcome.
The CoolSculpting® procedure from start to finish
Expert tip: The first few minutes of cold catch most patients off guard because the research and marketing tend to downplay how intense it actually is. It is genuinely cold and uncomfortable before the numbness sets in. That is not a sign something is wrong. It is the procedure working. Setting that expectation upfront is one of the most useful things a provider can do at consultation. If you know the first eight minutes are the hardest part and that numbness follows, you can settle in rather than worry.
Ready to see if you are a good candidate and get a real treatment plan before committing to anything? Book a complimentary consultation at New Day Medspa in Jacksonville, FL. A licensed ARNP or PA assesses your specific areas and walks through the full procedure, session count, and pricing before any sessions are scheduled.
What happens after the CoolSculpting® procedure
The session is done. Here is what the next hours, days, and weeks look like.
Immediately after: The treated area looks red, raised, and slightly swollen from the suction. It feels numb, firm, and possibly tender to the touch. This is the expected inflammatory response. Most of the visible redness and swelling clears within a few hours.
First 24 to 48 hours: Numbness can persist. Some patients experience mild aching, tingling, or itching in the treated area as circulation returns. These are all normal post-procedure responses. No ice packs on the area. No heat either. Let the tissue settle on its own.
Days 3 to 14: Numbness may continue. Some patients notice the area feels different when touched for up to several weeks. Fat cells have been damaged but not yet cleared. No visible change in the area yet.
Weeks 3 to 4: Early subtle changes for some patients. Treated zone feels slightly softer. Clothing may fit differently.
Weeks 8 to 12: Peak visible results. The body has cleared enough treated fat cells for the contour change to be clearly visible. This is the right time to compare baseline photos side by side.
Month 3 to 6: Final results settle. This is also when a second session on the same area is assessed if additional reduction is wanted.
What to do between CoolSculpting® sessions
The procedure does the work in the session. What you do between sessions affects how efficiently your body clears treated fat cells.
- Stay active. Regular exercise supports lymphatic circulation, the system that clears dead fat cells from your body over the weeks following treatment.
- Stay hydrated. Lymphatic clearance depends on adequate hydration. This is not complicated, but it does matter.
- Protect treated areas from the sun. Jacksonville's year-round UV exposure raises the risk of post-inflammatory pigmentation changes in recently treated skin. SPF 30 or higher daily on treated areas throughout your series.
- Do not wax or aggressively exfoliate treated zones while the skin is still in a post-treatment sensitivity phase, typically the first two weeks.
- Maintain stable weight. The fat cells removed by CoolSculpting® are permanently gone. Remaining fat cells in any area can still expand with significant weight gain. Keeping weight stable is what preserves the result long term.
About New Day Medspa
New Day Medspa is a medically guided aesthetic practice in Jacksonville, FL. All CoolSculpting® body contouring treatments are performed by licensed ARNPs and PAs using FDA-cleared CoolSculpting® technology. Every new patient starts with a complimentary consultation so the full procedure, realistic outcomes, and pricing are clear before any sessions are scheduled.
Suggested articles
- Does CoolSculpting hurt? Here's the truth: it goes deeper on what the cold sensation, the massage, and the post-session soreness actually feel like for patients treating different areas.
- How long does it take to see CoolSculpting results? Week-by-week breakdown covers the full results timeline from session day through month six, directly useful for patients who have just completed their first appointment.
- CoolSculpting® side effects: the honest breakdown covers what is normal in the days after a session, what warrants attention, and the one rare complication worth knowing about before you book.


.svg)